
DISCLAIMER: If anything bad, terrible or mediocre happens by following this guide, you, the reader- agree that it's all your fault. Proceed with caution. I'm not your attorney. I'm no expert and any ideas or constructive construction suggestions are welcomed and greatly appreciated in the comments.
Aggressive inline skating is largely defined by grinding.
The insatiable collective appetite for polesliding is outmatched only by a desire to discover new and exciting obstacles upon which to do that sliding.
With a little effort and around $150 US, you can supplement discovery and skatepark routine with invention.
IMPLEMENTS
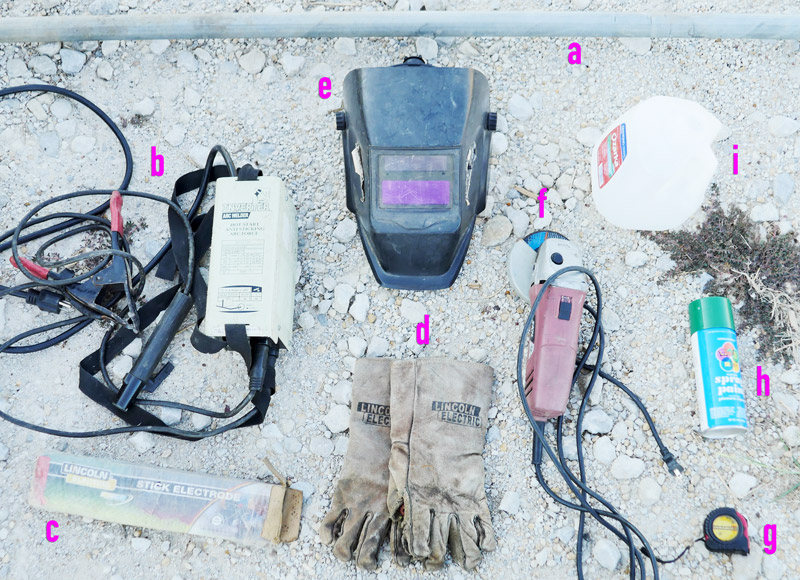
a Used or Trash Steel Pipe (FREE, CHEAP)
b Arc Welder (Borrowed free-$75, eBay/CL/Pawn/HillbillyUncle/2Fast2Furious Friend)
c E6013 Welding Rod Electrodes, 3 Lbs ($10)
d Welding Gloves ($10)
e Autodarkening Welding Helmet ($40)
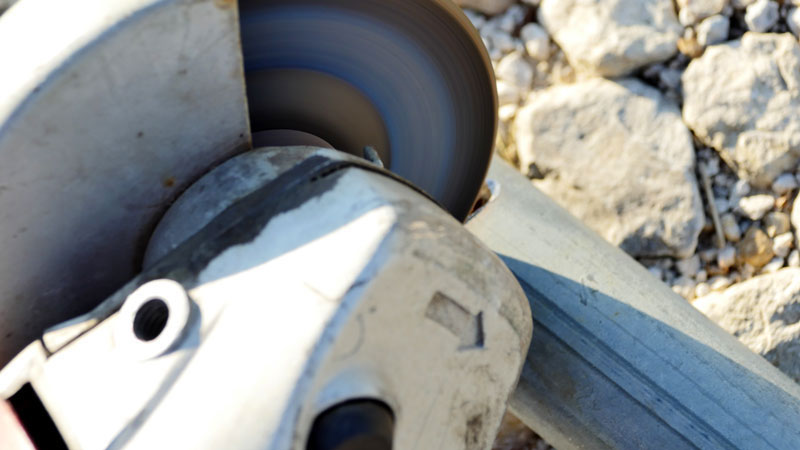
f Angle Grinder, Metal Grinding and Cutting Discs ($20-30)
g Measuring Tape ($1)
h Oil-based Paint ($1)
i Fire Extinguisher
Not Pictured:
Sunglasses (Worn Under Welding Helmet) ($1)
Steel Scrap Metal (for Practice) (FREE)
Sandpaper (CHEAP)
Broken Bags of Concrete (CHEAP)
Shovel (FREE, CHEAP)
Truck or Flatbed Trailer (optional, recommended)
2-3 Manual Labor Specialists (optional, recommended)
Costs Estimated in US Dollars
WELDING, DEMYSTIFIED
There are a variety of techniques that can be used to fuse metals together. For the sakes of cost and convenience we'll focus on shielded metal arc welding, which works by melting gas-shielded rods using current to create an electric "arc" to join metal.
Used equipment is great, and a welder sourced from Craigslist or a local pawn shop can keep costs down. However, quality safety gear is important to avert blindness, third degree burns and death. Death sucks.
It's worth noting that far better results can be achieved with higher-quality, more expensive tools- but this guide is intended for use as a functional low-cost starting point for rollerbladers on a budget with no prior welding experience.
DO DRAMATIC STAIRSETS DREAM OF PERFECT HANDRAILS?
First, you'll want to find a location that demands a rail.0 Make sure to get permission from any proprietor(s).1 Take measurements and think hard about what you want to skate. Ideally, you'll spot a conveniently located mellow stair set, abandoned foundation, or a remote drainage ditch located in a property ownership gray area. By installing a (hand)rail, you can do a valuable service for the rollerblading community and the community at large. The best possible outcome will result in a permanent, bust-free spot that also enhances safety for ditch-bound motorists and disabled or elderly stairtrippers.
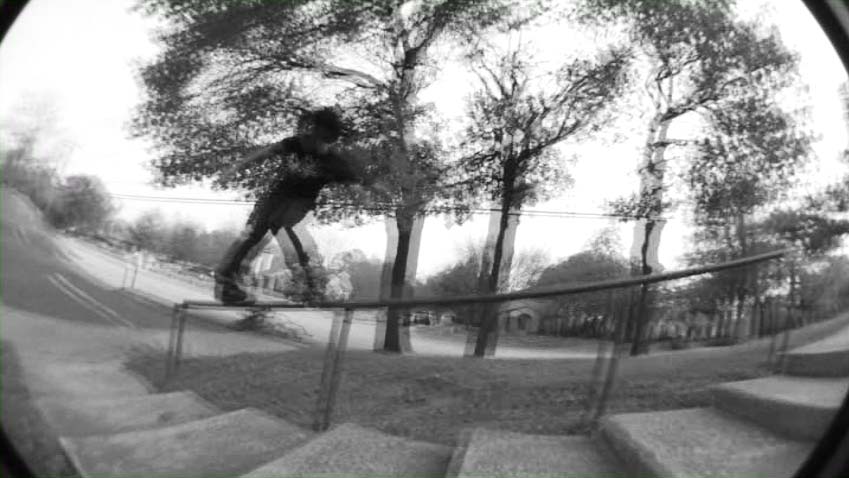
Pat on Riot Rail in The Shock Video. This piece was installed 200 feet from my front door nearly ten years ago. The stairset became handicap-accessible thanks to the rail addition. This installation was appreciated by the church groundskeeper, who has repainted it several times and welcomes rollerbladers.
Another view of Riot Rail. Mick executing a topside acid to forward dunk.
GETTING STARTED
It's a good idea to wear sunglasses under your autodarkening helmet (They're like wristguards... for your eyes) with welding gloves and reasonably heavyweight clothing that's ready for the landfill. Sleeveless is OK if you're into that leathery scumster look.
Familiarize yourself with the gear and process before diving into functional railcraft. Grinding away paint, rust and dirt from weld contact points helps bonding. Basically, arc welding is running current from a welding machine and completing a circuit to an item to melt electrodes (welding rods), as shown below.
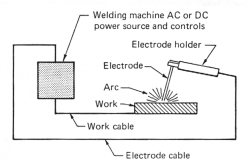
Find some chunks of steel scrap metal and focus on creating bonds between two pieces of metal that are strong enough to withstand considerable force.

With a budget welder, it's usually easier to turn the power up to 11 and burn through the metal before rolling the amperage back to a more workable setting.
Remember: whatever you create must tolerate the ongoing and repetitive full bodyweight abuse of 100-pound rollerbladers.
And 300-pound bikers on 25-pound BMXies.
Build for strength, not beauty.
Once you master the basic skill of tacking together metal bits, go on a quest for used or scrap steel pipe. This can usually be found on Craigslist, Freecycle, at local metal recyclers (by weight), decomissioned oil or gas wells, on the side of the road, or in the trash. Recycling pipe destined for meltdown into slider bars does everyone a great service.
MAKING DREAMS REALITY
Now that you've located and secured a spot, mastered basic welding technique, started a rice rocket exhaust business and obtained cheap used or scrap pipe otherwise headed to China for reforming, it's time to convert measurements into an actual object.
Cut your scrap pipe into adequate lengths. Keep in mind that you'll need to add an extra 18" (46cm) to 24" (61cm) to your support post height for burying. Mock it up on the ground before you go into production.
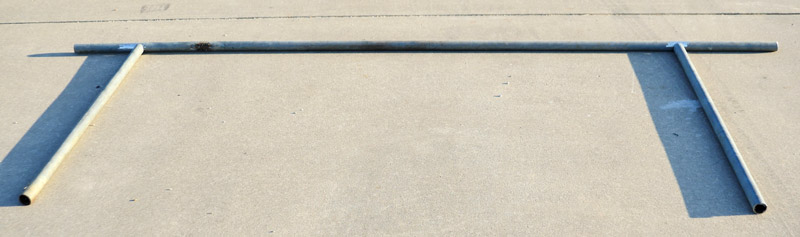
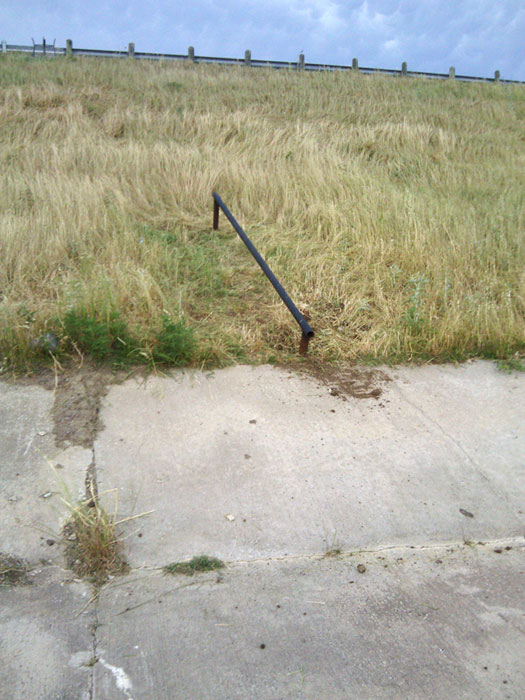
The final installed height of this rail was just over one foot.
Use common sense to determine support frequency based on the thickness of your metal and the target rail form. Always err on the side of sturdiness if your pipe is of a light metal gauge, or if dirt at the planting site is sandy, clay, or difficult to pack.
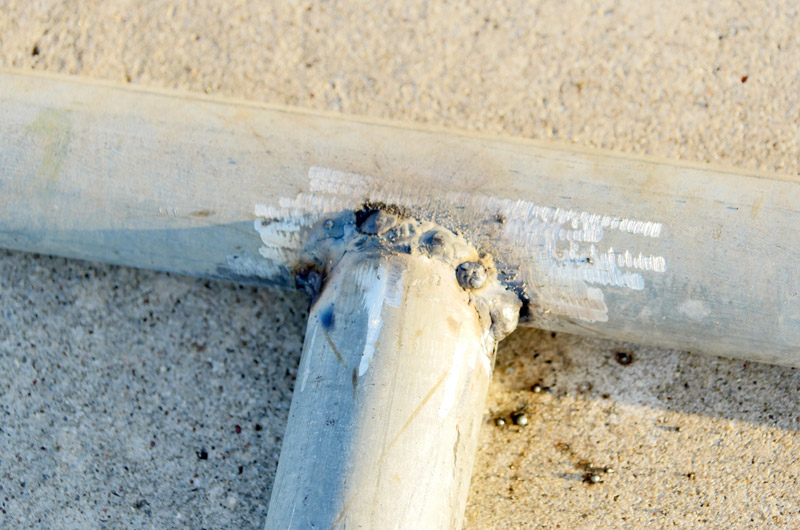
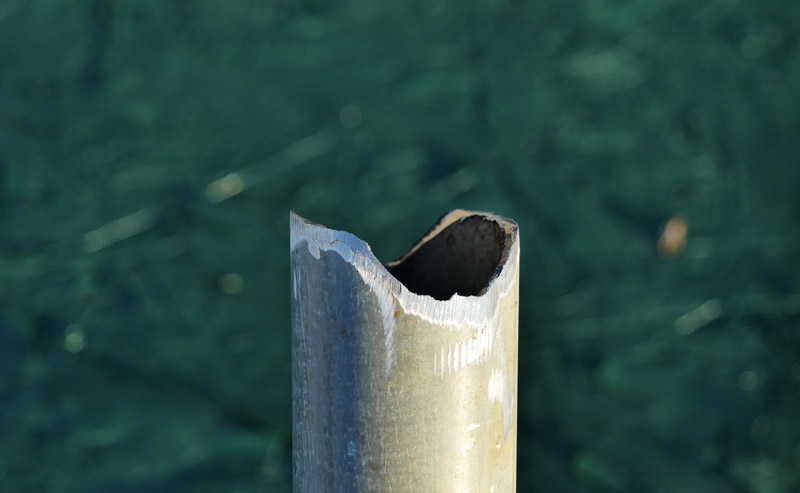 A notched support post ready for welding to a crosspiece
The vertical posts will also need to be notched to fit tightly against the crosspiece; otherwise your rail will be unstable, and you'll waste welding rod in the process of filling gaps. There are cutting guide tools available for this specific task that are priced beyond the practical scope of this article.
Rail fitting
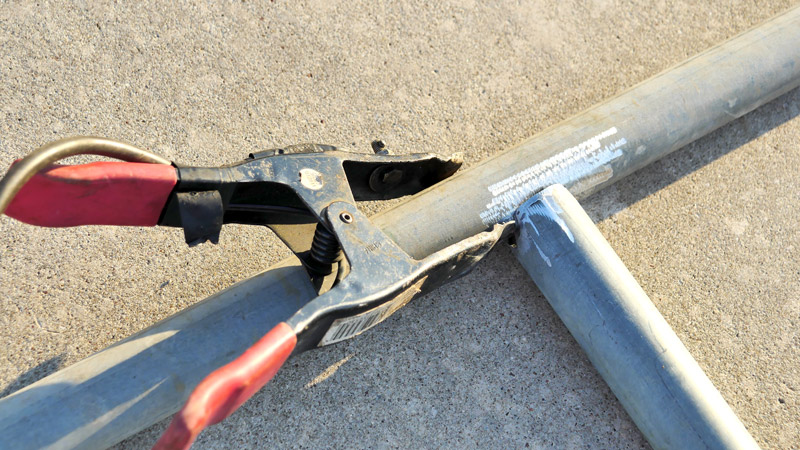
Mocked up and ready to weld
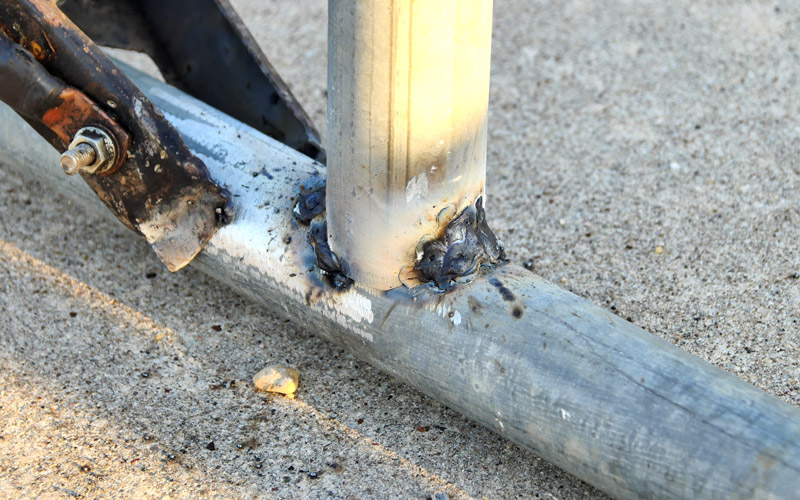
Initial welds
One side mostly finished
Sand and paint the piece once you've welded your supports to your crosspiece and angle-grinded away any superfluous bits of metal. Hitting the newly welded joints with paint is especially important, as these spots are guaranteed to oxidize unless sealed. The cheapest spraypaint available is great, so long as it's consistent with the setting. The best camouflage for a new handrail is one hidden in plain sight.
Professional welders will laugh at your handiwork, but the joke's on them: you're doing this for the kids,2 your own enjoyment, and the enjoyment of others.
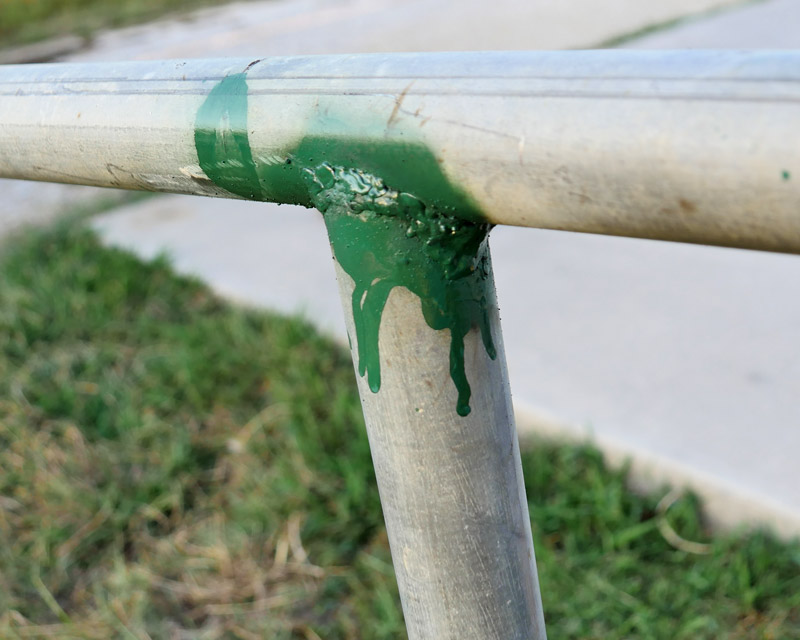
Reinforced joint after painting
The paint'll grind away, but it'll make the rail slide faster and more consistently with a good waxing. Your paint matches the property's color scheme, right?
Time to transport the piece to the spot, dig holes, and mix cement: this is the hard work. If digging, wait for a good rain. Concrete is always optional but always recommended.
Avoid doing this.
Your new thing might break immediately without concrete (or it might last for years), depending on factors like rail height, pipe gauge, post frequency, bury depth, soil composition and moon phase. A bonus to being lazy is that if all of these factors align favorably and no concrete is used, you can skate your creation immediately after installation.
Try to recruit other grinderbladers for transportation and planting if at all possible. With a taller piece, be sure to stake and steady it in the ground for concrete curing. Wait through the suggested dry time listed on the concrete bag and head back to skate. Keep it like a secret and/or mark your new rail with born-on date signage to prevent explorers from breaking your shit before you get to slide it yourself.
FUTURE
Obviously you can go overboard with this- and you should. 13 kinks,3 curved, gravity, etc.
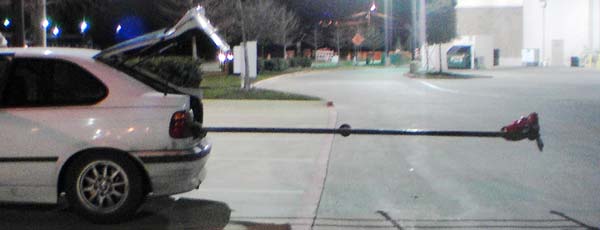
Rail ready for planting. The top piece of this obstacle was originally part of a discarded trampoline frame.
Keep in mind that your creation will probably require maintenance and repair: moreso if it becomes a popular destination. Most spots won't last forever,4 especially if they don't enhance a location more generally (see above and below) and invite maintenance by official groundskeepers, so be sure to enjoy your work while you can.
Planting rails is a great DIY spot method. It's far less labor and resource intensive than building ramps or ledges. There's also a relative degree of instant gratification with rails, and they can last just as long. The loss of a rail spot is also less devastating that discovering a concrete quarter or ledge turned to rubble.
Here's some great advice for for setting realistic expectations and staying motivated:
Al Dolega: I think that overall with guerilla (illegal) DIY stuff, the most important thing to know is that it will not last forever, it will cost you a lot of time and hard, back-breaking work, and probably a good bit of money, and you will likely get very little in the way of thanks or appreciation or substantive help. Accept and expect all of these things going in to it, and whatever return you do get on your investment will be all the sweeter, and any failures will be easier to swallow.
Lastly, more ideas:
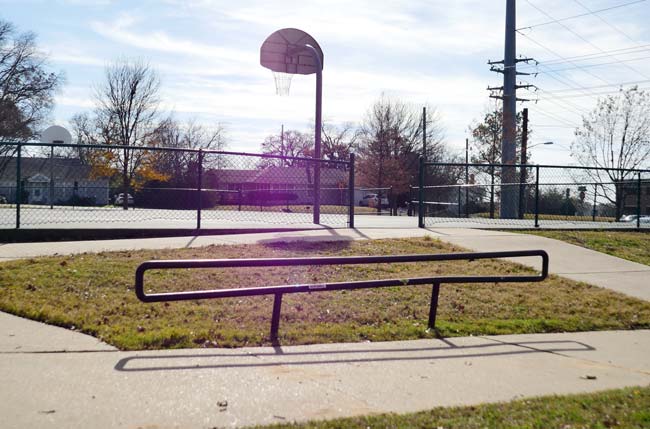
This p-rail was disguised as a b-ball court bike rack.
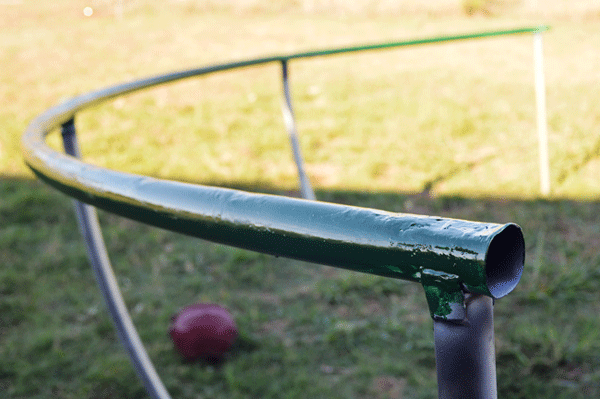
The Workout Rail concept is an improved version of the late 2000s Tree Rail craze. Great cardio.
Special thanks to Chainsaw and BeeP for technical review, J-Roc&Chainsaw for inventing the Tree Rail, Mick for daring to dream, Robot Reed, Troy, and everyone else that's installed railings.
- Of course you can just make a badass p-rail and chauffeur it around town, but it's way less fun. There are plenty other more and less practical ways to plant grind rails in the ground that cost something extra and may require more tools or effort. ↑
- I'm not your mom. ↑
- Kids: rollerbladers under 25? ↑
- Was reminded of the auspicious and infamous number of kinks to be reckoned with. ↑
- But with the right application and a bit of luck, some rails might last 40 or 50 years. Maybe longer. ↑
my on #
Simply wish to say your article is as astonishing.
Thanks a million and please keep up the rewarding work.
hummingbird on #
We need a different perception to determine how to get our
stuckness.
bo on #
cool. good article.
Asepoemuo on #
Some generally very useful info. Thanks
cksilver on #
love it